This template is based on the size of calendar pages I created in Excel (which measure 4” x 8 ½”). I found that this maximizes both my white cardstock as well as the 12” x 12” Designer Series Paper I’m cutting in 4” blocks. But if you prefer a different size calendar – be my guest.
You’ll need one full 12” x 12” sheet of patterned paper, bone folder/scoring tool, sticky strip, scissors, embellishments for calendar holder (ribbon, die cuts, etc), adhesive, full 12-month calendar (I’ve prepared a 2009 version in Excel – email me if you’d like a copy and let me know what year/version of Microsoft Excel you have), and images to use for bottom half of calendar (as you’ll see, I use a mix of 4”x4” patterned paper, stamped images and die cuts).
I’m going to skip past the calendar part as it’s pretty easy – especially since I’ve already created a 2009 calendar. It involves printing and cutting – see? Easy!
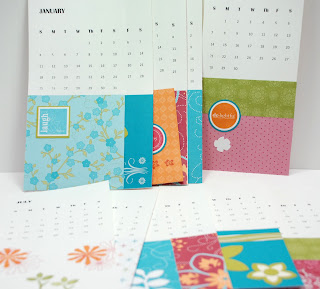
Step 1: Cut your monthly calendars into 4” x 8 ½” sheets.
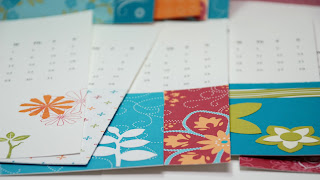
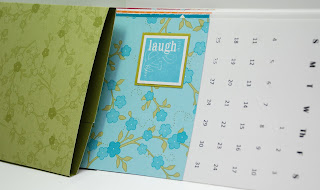
Step 2: Embellish the bottom 4” of each month as you would like. Below you’ll see I used a mix of patterned paper, die cuts, accents & elements (stickers) and stamps in coordinating colors.
Step 1: Cut your monthly calendars into 4” x 8 ½” sheets.
Step 2: Embellish the bottom 4” of each month as you would like. Below you’ll see I used a mix of patterned paper, die cuts, accents & elements (stickers) and stamps in coordinating colors.
And another view…
Next, I work on the holder (which doubles as gift wrap if you’re going to be giving these away, like I am). Plus, since I’ll only be displaying one month at a time, I’ll want a safe and cozy place for the other months to chill out until I get to them… so here it goes.
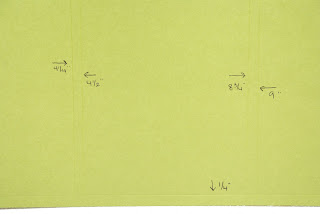
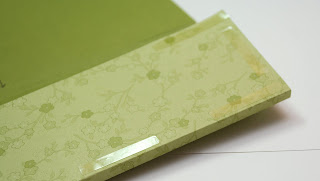
Using my 12” x 12” patterned paper I start by cutting it down to 12” x 8 ¾”. Then I score it at the following marks, lengthwise: 4 ¼”, 4 ½”, 8 ¾” and 9”. Turning the paper on it’s short side – I score one side at ¼”. See picture below for visual markings. You will have three panels total – two that measure at 4 ¼” and a smaller panel that measures at 3”. (You are currently looking at the INSIDE of the holder - notice this side of the paper is not patterned.)
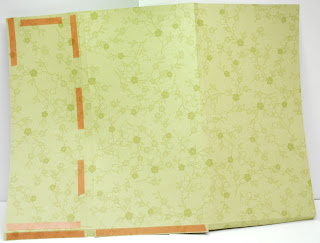
.jpg) On the side of the paper that is scored at ¼”, cut into the small notches up to the ¼” scored line (there will be two notches).
On the side of the paper that is scored at ¼”, cut into the small notches up to the ¼” scored line (there will be two notches).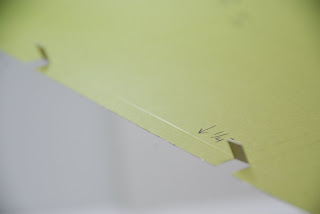
Next, we place the sticky strip in the appropriate places to hold this thing together. Most of the sticky strip will go on the smaller of the three panels, since this will be tucked inside. (Notice, in the image below you are now looking at the patterned side of the paper - the two larger panels will be the OUTSIDE of the holder.)
 Tip on using this sticky strip, in case you haven’t used it before – after you place it where you want it DO NOT remove the red backing until right before you are ready to adhere layers. Since it’s SO sticky – you run the risk of another part of your project brushing past it and getting stuck. Seriously – once that sticky strip is in place I work slow and steady.
Back to the project - once all sticky strip is in place I start by folding the smallest layer in first - the ¼” strip that creates the bottom of the holder. Take off red backing, fold at bottom ¼” score and fold in smaller panel.
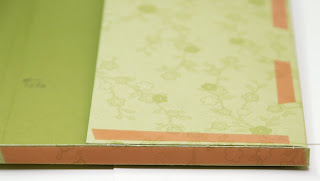 Next, I remove the red backing from the sticky strip along the smallest panel… see next 2 images.
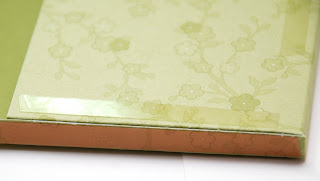
Move slowly … when you fold the larger panel over on top of this small panel you need to be careful to line up the corners before the layers of paper touch. Remember – this sticky strip means business! (I heard a rumor that ladies sometimes use this stuff to keep “gaping” v-neck lines from gaping too much! Now THAT’S strong!)
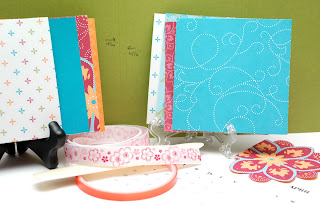
 And voila… you have your calendar and your holder. I’ll be gifting these along w/ a desktop photo holder to display one month at a time. You know the type…. the photo holder stands about 2 ½” tall and has some sort of clip at the top to hold one picture. Well, it will work just fine for this as well.
Have fun! And after trying this for yourself stop back by and leave a link to your project!
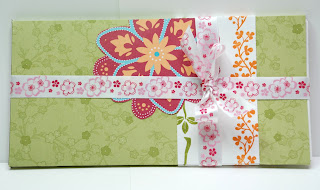
So, after all folding is done… and sticky strip has done it’s job, you have a calendar holder. I did not create a “lid” or topper for this… but you can if you want to. I simply slid my calendar in and added some embellishments to the outside before wrapping some ribbon around it like a present.
And voila… you have your calendar and your holder. I’ll be gifting these along w/ a desktop photo holder to display one month at a time. You know the type…. the photo holder stands about 2 ½” tall and has some sort of clip at the top to hold one picture. Well, it will work just fine for this as well.Have fun! And after trying this for yourself stop back by and leave a link to your project!
Pictorial prepared by Lori Tisdale (September 2008)


